

Getting started
Prerequisites
Before you start, make sure you have:
- Node.js 24+ and pnpm 10.27+ — Installed on your machine.
- A coding agent — Installed and authenticated.
experiences setupdetects Claude Code, OpenAI Codex, OpenCode, and Cursor on your PATH, and offers to install Claude Code, OpenAI Codex, or OpenCode for you if none are found. Cursor must be installed manually. - A Contentful Management API (CMA) token — Generate one in the Contentful web app under Settings > API keys > Content management tokens.
- A component library on disk — Any React, Vue, Astro, Stencil, or Web Components project works. This guide assumes a TypeScript + React library with roughly 10 components, plus a design tokens file.
Step 1: Install the CLI
Clone the SDK and build from source:
Link the CLI globally:
Step 2: Run the setup wizard
experiences setup checks your Node.js and pnpm versions and lets you set your preferred coding-agent:
Step 3: Start the import wizard
From any directory, run:
The wizard greets you and asks for the path to your component library:
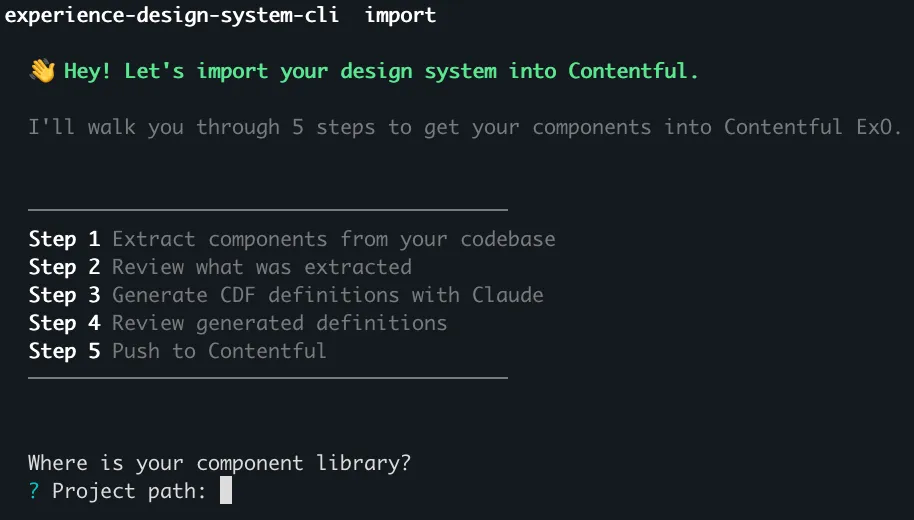
Point it at your project’s component library’:
Step 4: Provide your design tokens
Immediately after you select the project, the wizard prompts for a raw token source file (SCSS, CSS variables, JS/TS, Style Dictionary, or Tailwind config). This is optional — you can skip it and import components only.

For this walkthrough, provide the path to your tokens file:
The wizard classifies the raw variables into W3C DTCG format and includes them in the push alongside your components.
Step 5: Review the filtered components
Once extraction finishes, you can review AI-recommended exclusions, i.e. components that may be irrelevant to your Experiences. This is where you decide which components make it into Contentful.
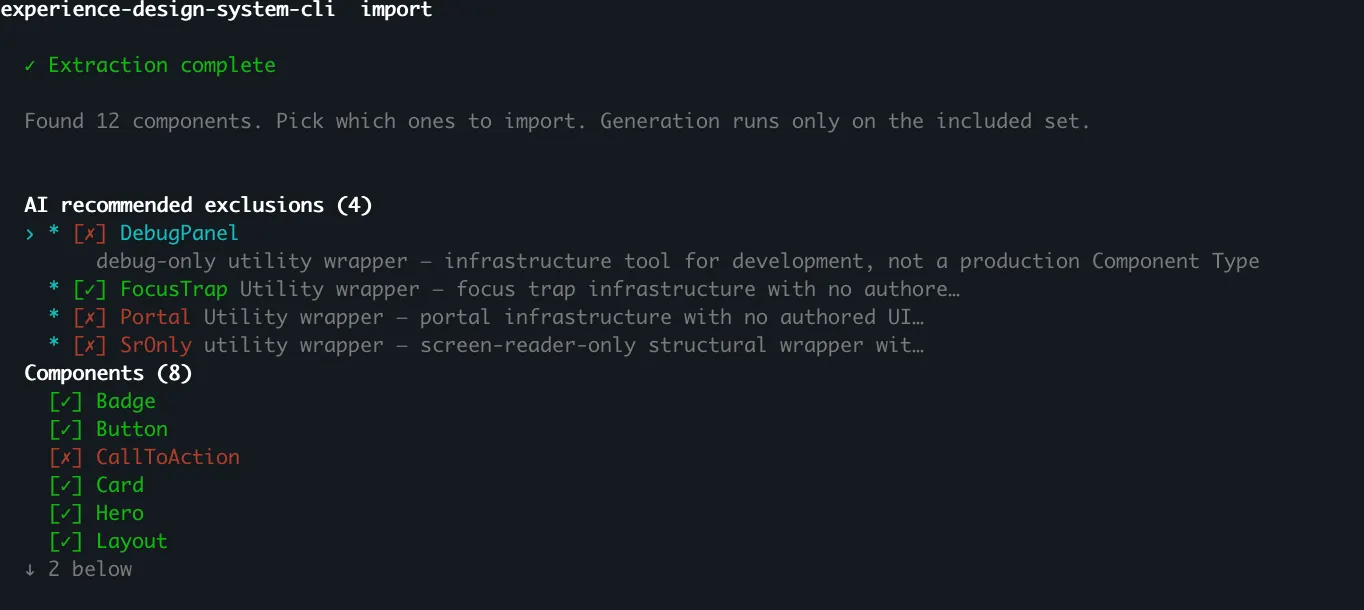
The AI flags things like DebugPanel, FocusTrap,and Portal for exclusion — component wrappers with no authorable UI. Review its call, override anything you disagree with, and confirm.
Step 6: Review the generated components
The wizard opens the Final review step and displays each generated component with its properties and slots. Walk through the list to inspect what the AI produced and tweak property names, types, defaults, or allowed values before push:
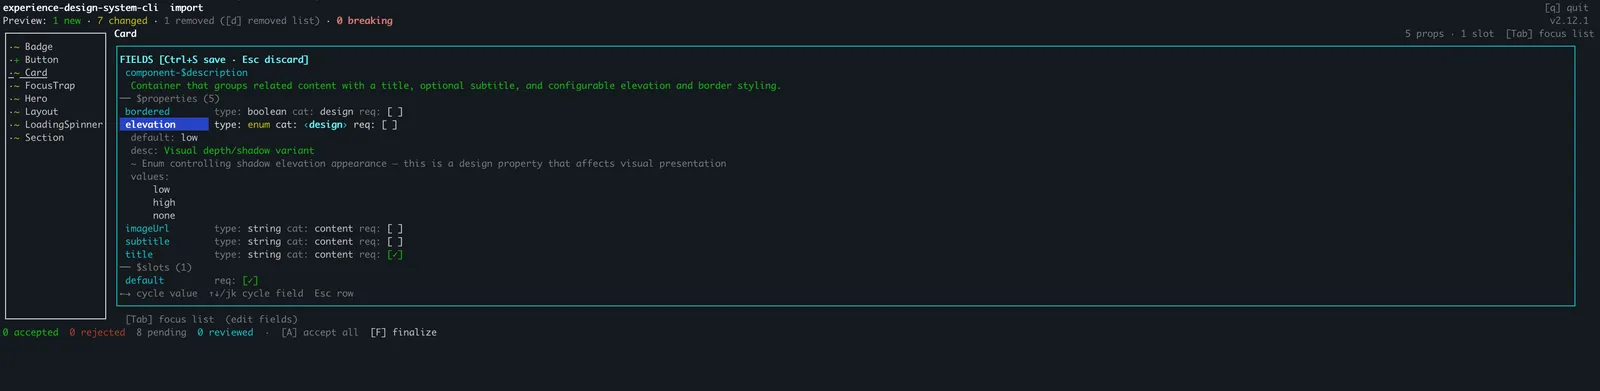
For any component in the list, you can also open the AI’s rationale, the raw generated JSON, or the extracted source snippet. A preview banner at the top of the screen tracks what will change in your Contentful space; open the removed-list overlay to see which components will be deleted from Contentful on push:
![Final review screen for a Card component. The preview banner at the top summarizes 1 new, 7 changed, 1 removed, 0 breaking. A pop-up overlays the top of the screen showing the removed-components list (CallToAction) that opens when the operator presses [d]. Below, the left sidebar lists all generated components; the main panel shows the component-level rationale explaining why props and slots were kept or excluded.](/developers/docs/_fern-img/34894f4a7de8320da9aabd1470c2cad2cf00d4327e8142efe5d9f51903d48ada.webp)
When you’re satisfied, finalize the review.
Step 7: Save and push
The wizard prompts you to save components.json and tokens.json to disk, push to your Contentful space, or do both.
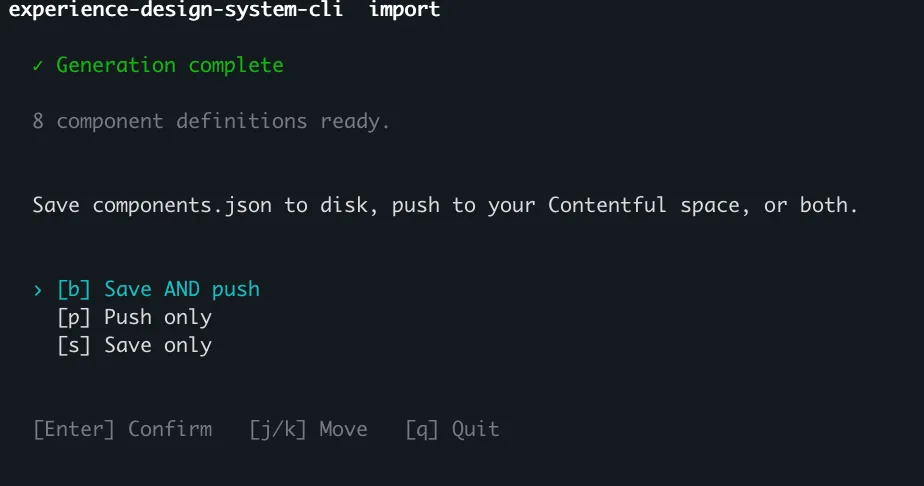
Before the push commits, the wizard shows a diff summary of what will be created, updated, and removed:
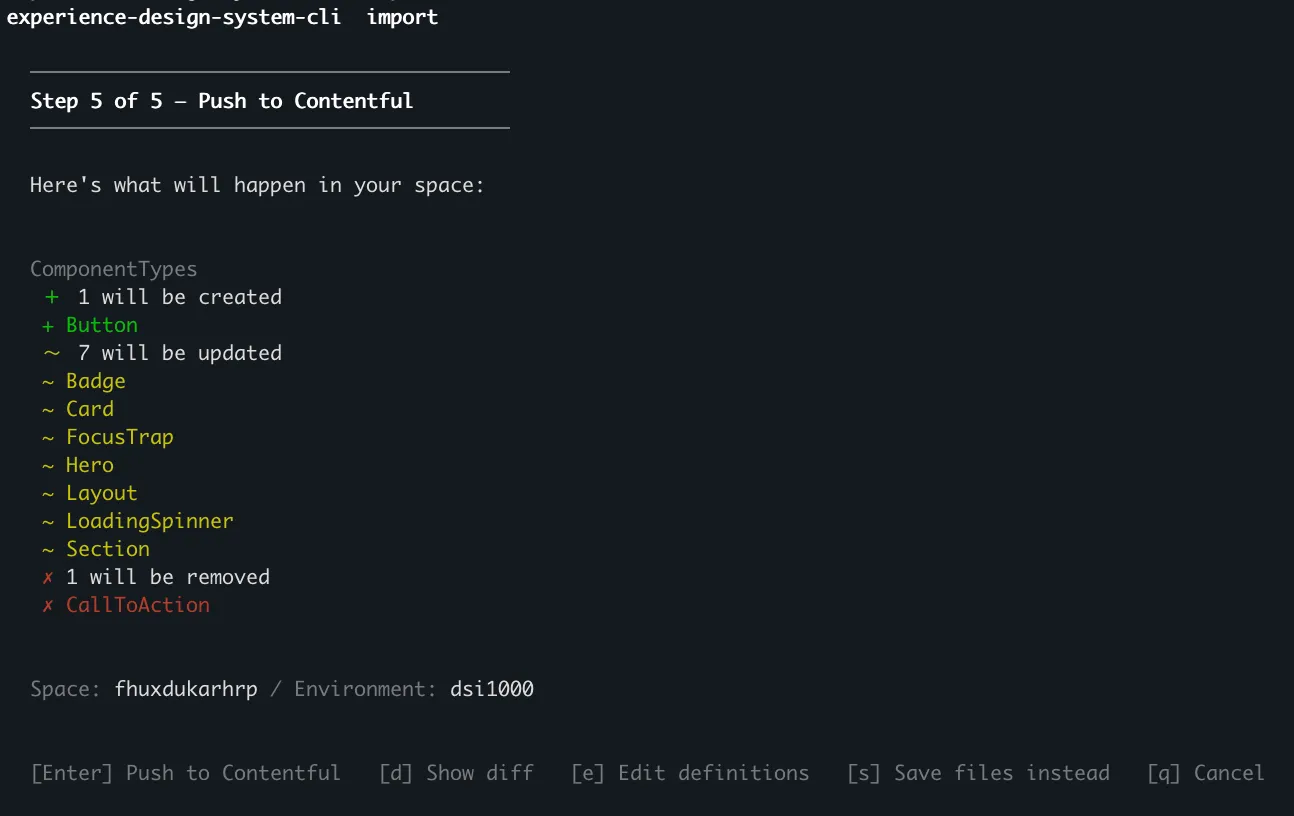
Components absent from your manifest are deleted from Contentful on push. Confirm the list of removals in the diff before pushing.
Step 8: Verify in Contentful
Follow the URL the wizard printed at the end of the push to jump directly to your imported components. To navigate there manually instead:
- Log in to the Contentful web app.
- Navigate to your space and environment.
- Go to Design system > Components to see the imported components.
What next
- Import components — Deep-dive on the wizard’s flow, the scope gate, and the Final review step.
- Import design tokens — Details on token formats and the token classification step.
- Coded components — Preserve embedded-component hierarchies with composite mode.
- Run history and replay — Push a recorded run again, or re-open one for edits.
- Command reference — Every flag on every subcommand.
- FAQ — Behaviors that surprise operators the first time through.